How to Draw a Seashell A Step-by-Step Guide for BeginnersDrawing a seashell can be a rewarding and relaxing experience. Whether you’re a beginner or a seasoned artist, capturing the delicate curves, spirals, and texture of a seashell allows you to connect with the beauty of nature. Seashells come in various shapes, sizes, and patterns, making them an ideal subject for practice. In this guide, we will walk you through the process of drawing a seashell from start to finish, offering tips and techniques to help you achieve a realistic and beautiful drawing.
Materials You’ll Need
Before you begin, gather the following materials
-
Pencils (preferably 2B and 4B for shading)
-
Eraser
-
Paper or sketchbook
-
Ruler (optional, for straight lines)
-
Colored pencils or markers (optional for adding color)
With these basic tools, you’re ready to begin your seashell drawing.
Step 1 Choose Your Seashell
Before drawing, it’s essential to choose the type of seashell you’d like to draw. Seashells come in many different shapes, from spiral conchs to flat scallop shells. Select one that appeals to you, or refer to a photo of a seashell for reference. Having a clear image in front of you will help you capture its details accurately.
Step 2 Sketch the Basic Shape of the Seashell
Start by sketching the basic outline of the seashell. Don’t worry about adding all the details just yet focus on the overall shape.
-
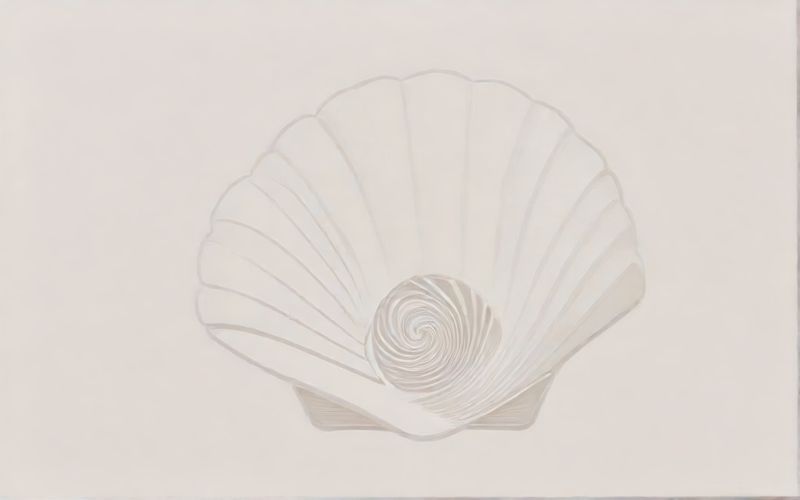
Draw the Outer Shape Lightly sketch the outer shape of the seashell. For a spiral seashell, start with a circular or spiral shape. For a more flat seashell, like a scallop, draw a half-circle or oval shape.
-
Add the Spiral (if applicable) If you’re drawing a spiral seashell, begin by drawing a small spiral at the center. Then, slowly extend the spiral outward, making the lines wider as you move further from the center. Keep your lines smooth and steady.
-
Refine the Shape Once the basic outline is drawn, use your pencil to refine the curves, adjusting the shape as needed. Keep in mind that most seashells are asymmetrical, so your drawing doesn’t need to be perfectly identical on both sides.
Step 3 Add Details to the Seashell
After you’ve established the basic shape, it’s time to add the finer details that will make your seashell look more realistic.
-
Draw the Ridges or Striations Most seashells have ridges, grooves, or lines running along the surface. Lightly sketch these lines, following the curve of the shell. These lines can vary in thickness and length, so don’t worry about making them uniform. They should appear natural and flow with the shape of the shell.
-
Add Texture Use shorter, slightly curved lines to create texture on the surface of the seashell. This texture can resemble small bumps, wrinkles, or a rough surface. Be sure to observe your reference image closely to add details that reflect the unique texture of the seashell you are drawing.
-
Define the Opening If your seashell has an opening, such as in a conch or clam shell, lightly draw this opening on the side. You can add a slight curve or tapering effect to suggest depth and give the shell a more three-dimensional appearance.
Step 4 Shading and Depth
To make your seashell drawing look realistic, shading is essential. This will help create depth and dimension, making your seashell appear more lifelike.
-
Determine the Light Source Think about where the light is coming from. If the light is coming from the top left, for example, the left side of the seashell will be lighter, and the right side will be darker. This contrast will help give your seashell depth.
-
Shade the Shell Using your 2B pencil, lightly shade the areas of the seashell that are farther from the light source. You can add deeper shading to the interior of the shell and along the ridges to enhance the contrast.
-
Blend the Shading To create a smooth transition between light and dark areas, use a blending stump or your finger to gently blend the shading. Be sure to keep the transitions soft and natural, mimicking the way light hits the shell.
-
Highlight the Curves Use your eraser to gently lift highlights from the areas where light would naturally hit the shell. This can be along the top ridges or in the center of the spiral. Adding highlights will make your drawing appear more three-dimensional and give the shell a polished look.
Step 5 Finalizing the Drawing
Now that your basic shape, details, and shading are in place, it’s time to add any final touches to your seashell drawing.
-
Refine the Details Go over the details of your seashell one more time to make sure everything is sharp and clear. Darken the lines where necessary, especially along the ridges or in the crevices of the shell.
-
Add Texture to the Opening If your seashell has an opening, add texture inside the opening by drawing small, curved lines or shading to suggest depth. This will make the opening appear more realistic.
-
Smooth Out the Shading Take a moment to smooth out any harsh lines or uneven shading. Ensure that the shading is soft and natural, with no visible pencil marks. A clean and smooth surface will give your seashell a polished and professional look.
-
Optional Add Color If you wish to add color to your seashell, you can use colored pencils, markers, or watercolors. Start with light layers of color and gradually build up to darker tones. Remember that seashells often have a combination of soft pastel hues, along with deeper, more vibrant shades along the ridges. Adding color will enhance the beauty of your drawing.
Tips for Drawing a Realistic Seashell
-
Use Reference Images Always work from a reference image or an actual seashell to make sure your proportions and details are accurate.
-
Observe the Light Lighting plays a critical role in making your seashell look realistic. Study how light and shadows fall on the shell to give it dimension.
-
Practice Different Types of Seashells There are many varieties of seashells, each with its unique shape and texture. Experiment with different types to challenge yourself and improve your drawing skills.
-
Take Your Time Don’t rush the process. Take your time with each step, focusing on the details and refining your drawing gradually.
Drawing a seashell is a fantastic exercise in observation and technique. By following these simple steps and focusing on details like shape, texture, and shading, you can create a beautiful, realistic seashell drawing. Whether you’re drawing for fun or adding a seashell to a larger artwork, these skills will help you capture the natural beauty of the ocean. With practice and patience, you’ll be able to draw seashells that look as though you could pick them up from the beach. Happy drawing!