How to Effectively Drain Thicket Excavations A Complete GuideThicket excavations can be challenging, especially when water accumulates in these dug areas, causing issues such as poor soil conditions and flooding. Proper drainage is essential for maintaining the integrity of the excavation and preventing further complications. In this guide, we will explore the best methods for draining thicket excavations, ensuring a dry and stable environment for any subsequent work or planting.
Understanding Thicket Excavations
Thicket excavations are typically dug in areas that are dense with vegetation, often used for projects like creating pathways, building foundations, or clearing land. These excavations may encounter issues with waterlogging, which can delay construction or soil preparation. Proper drainage helps maintain the structural integrity of the excavation and can prevent erosion, root rot, and the buildup of stagnant water.
Why is Proper Drainage Important?
Without effective drainage, thicket excavations can quickly turn into waterlogged, unstable areas. The main benefits of proper drainage include
-
Prevention of Soil Erosion Excess water can wash away soil, leading to erosion and weakening the excavation walls.
-
Improvement of Soil Quality Proper drainage keeps the soil from becoming too saturated, allowing for healthier soil conditions, especially if you intend to plant or grow vegetation in the area.
-
Prevention of Standing Water Water accumulation in excavations can cause standing pools that become breeding grounds for pests and diseases.
When to Drain Thicket Excavations?
The timing for draining thicket excavations depends on the weather and the state of the excavation. If the area has been heavily excavated and shows signs of water accumulation, it’s time to address drainage. It’s crucial to act before water can cause damage to the structure or soil quality.
Tools and Materials Needed for Draining
To successfully drain a thicket excavation, you’ll need the following tools and materials
-
Shovels and Spades For digging trenches or adjusting the excavation site.
-
Drainage Pipes Perforated pipes or French drains are effective for managing water flow.
-
Gravel To create a layer around the drainage pipes, helping water move more efficiently.
-
Land-Leveling Tools To ensure the site slopes away from the excavation.
-
Geotextile Fabric To prevent soil from clogging the drainage system.
-
Water Pumps (Optional) In case there is significant standing water that needs to be removed.
Step-by-Step Guide to Draining Thicket Excavations
1. Assess the Excavation Site
Before beginning any drainage work, inspect the excavation to identify the areas where water is accumulating. This will help you determine the best location for drains and any grading adjustments that need to be made. Look for low spots where water naturally collects and note areas where the water flow may be obstructed.
2. Create a Slope for Water Flow
In many cases, the excavation itself may need to be adjusted to encourage water to flow away from the site. This can be done by grading the surrounding land or creating a slight slope at the base of the excavation. The goal is to ensure that any rainwater or groundwater naturally drains away from the excavation and does not settle in the area.
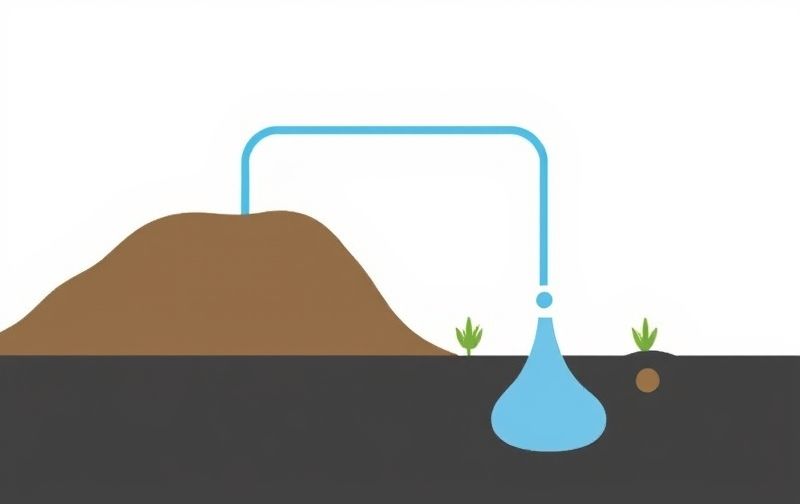
3. Install French Drains
French drains are one of the most effective ways to manage water in thicket excavations. Here’s how to install one
-
Dig a Trench Begin by digging a trench that leads water away from the excavation. The trench should be slightly sloped, around 1% to 2%, to allow for proper drainage.
-
Add Gravel Line the bottom of the trench with a layer of gravel. This will create a space for water to flow through before it enters the drainage pipe.
-
Install the Perforated Pipe Place a perforated pipe on top of the gravel. These pipes have holes that allow water to seep into the pipe and be redirected away from the excavation.
-
Cover with Fabric and Gravel Cover the pipe with a geotextile fabric to prevent soil from clogging the pipe. Then, fill the trench with more gravel, leaving a little space at the top for soil or mulch.
-
Backfill the Trench Finally, backfill the trench with soil to restore the area to its natural grade, ensuring the water flows smoothly.
4. Use Drainage Tiles or Piping
Another option is to install a network of drainage tiles or pipes that redirect water away from the excavation. This method is particularly effective in larger excavations. Follow these steps
-
Dig a Channel for the Pipes Dig a channel around the edges of the excavation where water is accumulating. The pipes should be laid in a manner that directs water away from the site.
-
Install the Drainage Pipes Lay the pipes in the channels, ensuring they are slightly sloped toward the desired drainage point. Connect the pipes to ensure water flows efficiently.
-
Backfill and Compact Soil After placing the pipes, backfill the area with soil, compacting it to remove any air pockets and prevent shifting.
5. Create Surface Drains
In some cases, surface drains may be necessary, especially if you’re dealing with large volumes of rainwater. Surface drains are installed at the low points of the excavation and direct water into a drainage system. Here’s how to install them
-
Locate Low Points Identify where water collects the most in the excavation.
-
Install Surface Drains Dig shallow holes and install surface drains or catch basins. These drains should have a gentle slope to direct water into the main drainage system.
-
Connect to Drainage System Ensure the surface drains are connected to your French drain or pipe system to direct the water away from the excavation.
6. Monitor the System
After installation, it’s important to regularly check the drainage system to ensure it is working as intended. During periods of heavy rain, check the excavation site for any signs of water accumulation or backup. If any issues arise, such as clogging or improper flow, make the necessary adjustments to improve the system’s efficiency.
Tips for Maintaining Drainage Systems
To keep your drainage system in top shape, consider the following tips
-
Regular Inspections Check the drains periodically to ensure they are clear of debris and functioning properly.
-
Keep Drains Clean Remove any dirt, leaves, or other debris that may clog the drains, especially after heavy rains or storms.
-
Check for Settling Over time, the soil around the drains may settle, requiring you to add more gravel or soil to maintain the correct slope for water flow.
-
Address Puddling If puddles form in specific areas of the excavation, adjust the grading or install additional drainage.
Properly draining a thicket excavation is crucial for preventing water accumulation, improving soil quality, and ensuring the long-term stability of the area. By following the steps outlined in this guide, you can create an effective drainage system that will protect the excavation site and allow for future use. Regular maintenance and inspections will keep the system functioning properly, ensuring that your excavation remains dry and stable.